Pickling is a fantastic way to start preserving your own food at home. Homemade pickles can last over a year in your pantry, and because of their acidity and salt content, they don’t spoil as easily as vegetables canned using other methods.
The best methods of pickling to do at home are:
- Refrigerator pickling
- Canned pickling
- Pre-soaked pickling
- Fruit pickling
- Fermented Pickles
Whether you’ve just harvested more cucumbers from your garden than you could eat in a month and you don’t know what to do with it all, or you want to try traditional methods of food preservation, you’ve come to the right place. In this article, we’ll go over everything you need to know to get started pickling in your home kitchen today.

The 5 Best Pickling Methods for Pickling at Home
There are five ways to make pickles at home using simple methods that have been used in home kitchens for decades (and in some cases, centuries!).
Each pickling method produces a slightly different flavor and texture, so we recommend giving them all a try. If you’re new to pickling, we recommend starting with refrigerator pickles and working your way down the list as we’ve put the methods in order of complexity.
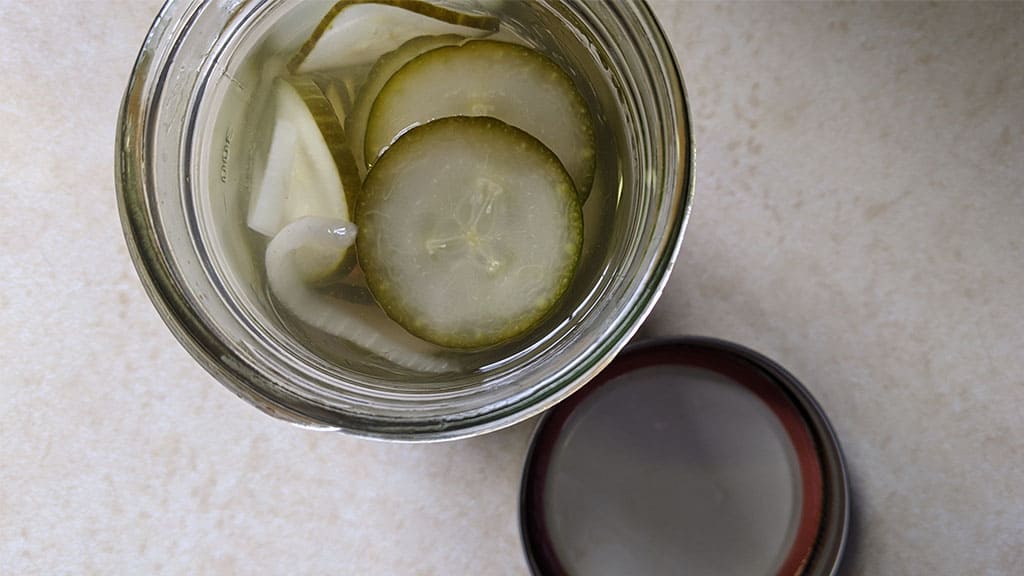
How to Make Refrigerator Pickles at Home
Refrigerator pickles, sometimes called quick pickles, are the best place to start if you’re new to pickling. They’re quick and easy to make, and they don’t require any special equipment. Refrigerator pickles also let you experiment with different brine flavors without a huge time commitment.
Many people prefer the fresh, crisp flavor of refrigerator pickles over traditional pickles. So even if you want to try one of the other pickling methods on this list first, you should give this method a try as well. It might surprise you.
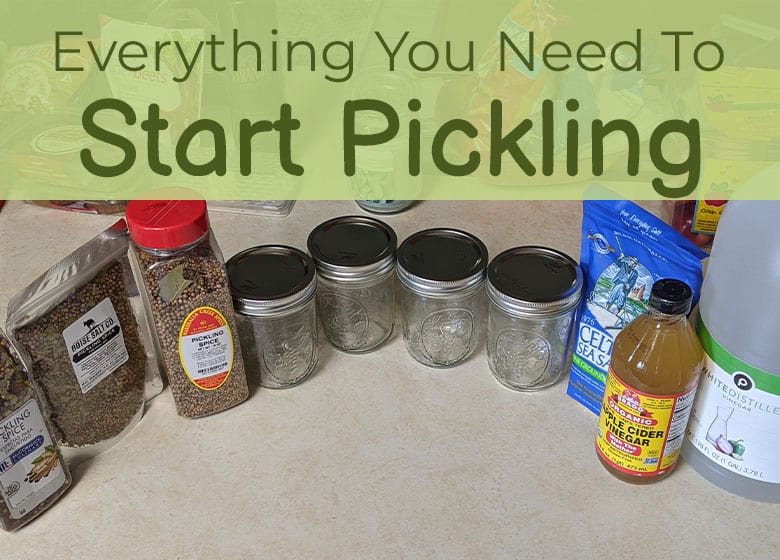
Here’s what you’ll need:
- A clean container with lid: We prefer glass mason jars because they’re easy to work with, and we also seem to have some on hand. They are also relatively inexpensive and a sound investment.
- A knife and cutting board: You’ll need to prepare the vegetable before submerging it in the brine.
- Brine ingredients and a vegetable to pickle: We’ll talk more about brines later. Most have water, vinegar, salt, and seasoning. You can pickle just about any vegetable, but if this is your first time pickling, you can’t go wrong with cucumbers!
- Measuring cups and spoons
Once you have your equipment and ingredients together, you can get started!
Step-by-step instructions to make refrigerator pickles:
- Clean the vegetable thoroughly. If using cucumbers, scrub the pickle with your hand under running water until it is clean. Drying the cucumber with a cloth or paper towel will also help remove any hidden dirt.
- Cut the vegetable into the desired shape and size. For refrigerator pickles, thinner or smaller sizes will give the brine more surface area to infuse flavor. If you aren’t a fan of cucumber skin, you can peel the cucumber, but you should be prepared to eat your pickles before they get mushy.
- Add the brine ingredients to the jar. Some brine recipes suggest heating the brine before doing this step, but for refrigerator pickles, we like to keep it as simple as possible. If you’re using a recipe, you should follow it for the best outcome.
- Add the vegetables to the jar and add more brine if necessary, to cover the vegetable. It is okay if a little bit of the pickle is sticking out of the brine at the top of the jar or if the vegetable is floating. Since you’re putting it in the fridge, it doesn’t matter.
- Put the lid on the container and shake it to make sure the brine and the vegetables are mingling. A couple of good shakes should do the trick. Spices and peppercorns may settle to the bottom again, but their flavors will spread through the jar.
- Place the jar in your refrigerator and keep it there for 24 hours, if at all possible. It is best to eat these within a month of pickling, but most of the time, you’ll have them gone in a matter of days!
How to Make Canned Pickles at Home
Canned pickles are similar to refrigerator pickles with one big difference—you don’t put them in the refrigerator. Instead, you use canning methods so that they can be stored at room temperature.
This method is great when you have a lot of vegetables you want to pickle, and you want to be able to store the pickles for more than a month.
These pickles don’t have that fresh flavor because they take on more of the brine flavor, and they will taste more like the pickles you find at the grocery store (but better).
Here’s what you’ll need to make canned pickles:
- Sanitized mason jars and lids: We recommend the wide mouth jars because it is easier to pull pickles out of them. You can sanitize jars in boiling water right before adding in the pickling ingredients.
- Canner or very large pot with a rack: The glass bottom of the jars should never be in contact with the bottom of the pot. Canners come with racks, but you can also use any metal rack that fits into the bottom of the pot and prevents the jars from touching the pot bottom.
- A jar lifter: If you’re making a lot of pickles, invest in a jar lifter. It makes pulling hot jars out of the canner or pot easy, and you won’t burn yourself.
- Bubble popper: This isn’t a must, but we recommend it if you plan on canning regularly. You can use a sanitized butter knife as well.
- A damp cloth: You might want a couple of these handy, but you’ll need at least one to wipe the rim of the jar before sealing.
- Saucepan: This needs to be large enough to hold all of your brine for this batch of pickles.
- Knife and cutting board
- Measuring cups and spoons
- Brine ingredients and vegetables
If you’re just starting out with canning, we recommend getting a kit like this one that includes all the accessories you’ll need to make it safe and easy.
Step-by-step instructions for canned pickles:
- Before you begin, make sure all of your jars and equipment are sanitized. This will help keep harmful bacteria out of your pickles.
- Prepare your vegetables by cutting them into the desired size and shape.
- Make the brine according to the recipe that you’re using. This should involve heating up the brine in a saucepan.
- Place large spices or cloves of garlic into the jar.
- Place the vegetables into the jar.
- Pour the brine into the jar, but don’t fill it all the way to the top. You should have about ½ inch of space between the top of the brine and the top of the jar.
- Remove air bubbles from the jar using a bubble popper or butter knife. You might need to add more brine to the jars after doing this if you had a lot of air bubbles.
- Wipe off the rims and threads of the jar where you’ll be putting the lid. Often, you’ll have spilled or splashed some brine while filling the jars, and this can interfere with the quality of your seal.
- Place the vacuum lid on the jar. This is the disc part of the lid, and you should never reuse this.
- Place the screw-on rings on the jars and hand tighten. Don’t go crazy trying to make this super tight. Just screw it on firmly without using too much force.
- Put the jars into the canner or large stockpot and boil for about 15 minutes if you used quart-sized mason jars.
- Remove the jars and let them sit at room temperature for 24 hours. If you have stone countertops, it is best to place the jars on a cutting board. Cold stone countertops can cause boiling hot mason jars to crack.
- Test the seal by pressing on the center of the vacuum seal. It shouldn’t move. If it does, the jar didn’t seal. You can still enjoy those pickles, but they should be stored in the refrigerator and eaten within a month, just as if they were refrigerator pickles.
Now you’re done! Be sure to note when you made the pickles so that you know when you need to eat them by.
How to Make Pre-Soaked Pickles
Making pre-soaked pickles isn’t exactly another pickling method. It is more like an optional step that many consider not optional at all. If you are using a vegetable with high water content (like cucumbers) and you want your pickles to be crisp, then this step is essential.
The pre-soaking step happens before you start the brining process, but after you cut the vegetables. During this process, you will soak the pickles for a certain amount of time.
There are three different ways that people pre-soak their pickles:
- Soak in ice water or in crushed ice: If using this method, you’ll need to soak the vegetables in ice water or crushed for about 5 hours. There should be more ice than water in this situation. Some recommend doing this in your clean kitchen sink or large bucket.
- Soak in saltwater: You’ll need about half a cup of pickling salt for every 4 pounds of pickles you’re processing. Place the pickles in a bowl and layer the salt over them, and then pour cold water until they are covered. Let the pickles sit in saltwater overnight and then rinse them off the next day before starting the brining process.
- Soak in lime-water solution: Soaking pickles in a solution of water and food-grade lime is a sure fast way to have crispy pickles. Some people shy away from using lime, even when it is food grade. You’ll use ½ cup of food-grade lime for every gallon of water (16 cups).
After soaking, you can continue with the canning process as you normally would.
How to Make Fruit Pickles at Home
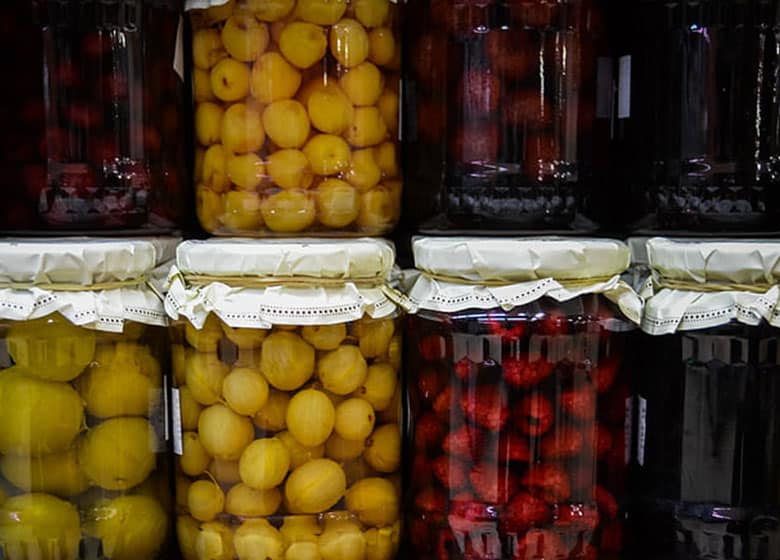
You’ve probably never considered pickling fruit, and it might not sound appetizing at first glance. But stay with us for a minute, and you might change your mind.
The brines and spices used to pickle fruits are generally more sugar-heavy and syrupy, but they still include vinegar. You’ll find more dessert-friendly spices like cinnamon and nutmeg.
The process is much the same. You can use canning methods to preserve the pickled fruit, or you can keep them in your refrigerator.
Some fruits you can pickle at home:
- Peaches
- Plums
- Blueberries
- Lemons
Pickled fruits are usually just as easy to make at home as pickled vegetables, but getting the flavors right can be trickier. It is best to follow a specific recipe so that you don’t end up with something inedible.
How to Make Fermented Pickles at Home
Making fermented pickles is just as easy as making canned or refrigerator pickles. You’ll need to find a fermentation-friendly pickle recipe, like this one from Feasting at Home. Follow any recipe you use precisely so that you don’t end up with rotten pickles.
Fermented pickles use a salt-based brine instead of a vinegar-based brine. Here’s how to do it:
- Start with clean and sanitized jars, just as you would with canned pickles.
- Wash your cucumbers, but don’t use a cleaner that would kill bacteria. Fermentation needs that bacteria!
- Pack the jars! Some recipes will tell you to alternate layers of seasonings and cucumbers, and others just have you pack it in however you’d like. We like the layering method so that the flavor is evenly distributed. The jars should be at least ¾ of the way full.
- Cover the jar with a secure but breathable lid. Many use a cloth secured with a rubber band with good results. A tightly fitted lid will cause a pickle explosion.
- Keep the jar at room temperature in a dark location unless you see bubbles forming at the top. This takes 3 or more weeks. Pickles can be stored longer, but they will become increasingly sour.
Is there a Special Method for Half Sour Pickles?
Half sour pickles don’t require a special method, per se. To make them, you use the refrigerator method, and you don’t use any vinegar. The brine is just water, salt, and seasoning. Because there is no vinegar in these pickles, they cannot be safely canned.
If half-sour pickles are your jam, check out this traditional recipe from The Food Dictator.
How to Make a Brine for Pickles
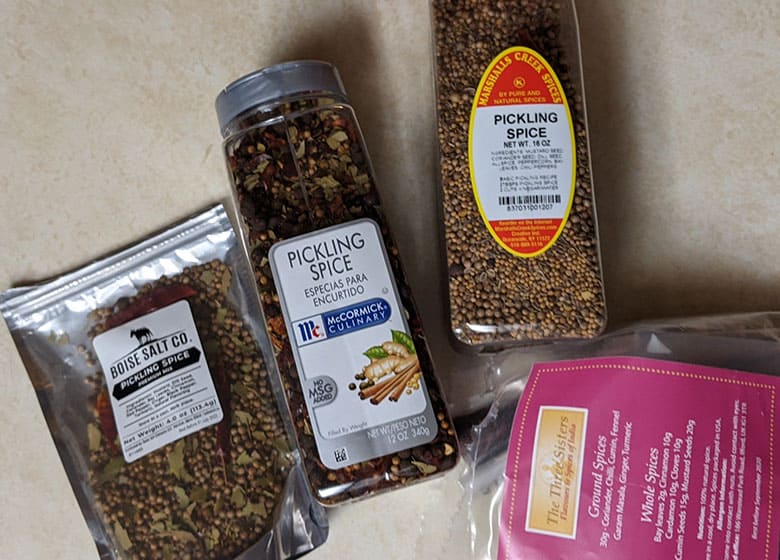
The method you use to make pickles will impact the flavor and texture of your pickles, but the brine is going to have an even bigger impact. Selecting a brine and deciding which spices you want to use is half the fun of pickling.
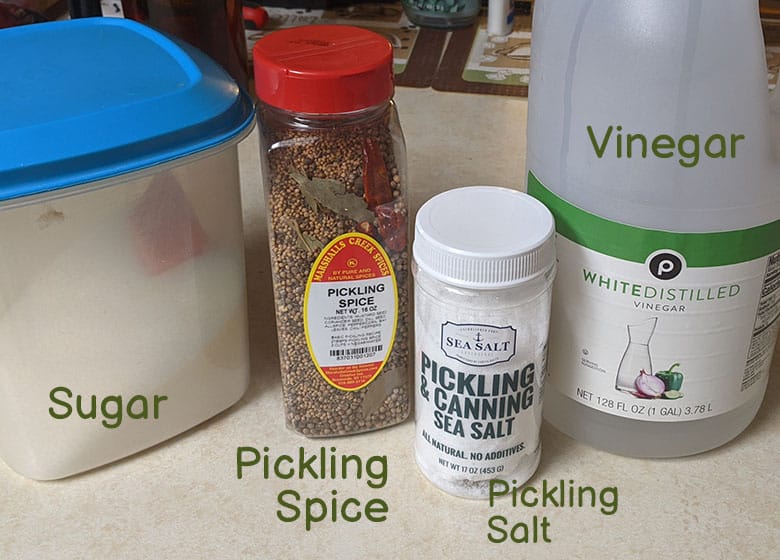
Brine usually consists of four things:
- Water: If you have hard water in your home, you’ll need to filter it or use store-bought water for pickling.
- Vinegar: When canning pickles, it is essential that you use vinegar with at least 5% acidity. Most people use distilled white vinegar or apple cider vinegar. This is less important for refrigerator pickles because the cold will inhibit bacteria growth.
- Salt: Pickling salt is best because it doesn’t contain additives, and it is super fine.
- Sugar: Raw or white sugar is fine. This is optional in most recipes, but it does help offset some of the saltiness.
When canning pickles, the ratio of these items is important for safety reasons, so it is best to always follow a recipe like this one from the Farmer’s Almanac. For refrigerated pickles, the ratio is more flexible, but for best results, stick to a recipe.
How to Change the Flavor of Pickles
If you’re looking for a pickle with more flavor than a basic brine, then you’re going to want to add in some other vegetables or seasonings. Here are some ideas to get you started:
- Dill
- Garlic cloves
- Hot peppers
- Peppercorns
- Sliced onion
- Cloves
- Celery seed
- Allspice
- Cinnamon
- Turmeric
- Mustard seed
- Ginger
- Bay leaves
Dill and garlic are traditional with cucumbers, but just about anything in your spice cabinet can be added to your pickles! Experiment with different seasonings and different amounts until you hit upon the flavor you like.
Do You Need to Cook Vegetables Before Pickling?
Some vegetables require blanching, and others require cooking before you can cook them. Let’s take a look at some common examples:
- Cucumbers: No cooking needed.
- Carrots: Blanch if not using heated brine
- Green beans: Blanch if not using heated brine
- Beets: Cooked to tender
As you can see, unless the vegetable is super hard (like beets), you won’t need to cook them or blanch them before pickling as long as the brine is warmed up before adding to the jar. Essentially, the boiling hot brine blanches green beans and carrots, and the canning process makes them tender.
If you’re doing refrigerator pickles and you aren’t heating up the brine, you can use your judgment. If you wouldn’t eat it raw normally, you should probably blanch or cook it before pickling it.
What is the Best Pickling Method?
We love all things pickling, so we use all four pickling methods regularly, but our go-to method is canned pickles because it lets us store a LOT of pickles for a long time.
If you’re just starting out, we recommend you start with refrigerator pickles because they are simple, and you still get the satisfaction of playing with flavors and different cuts before you invest in canning equipment.