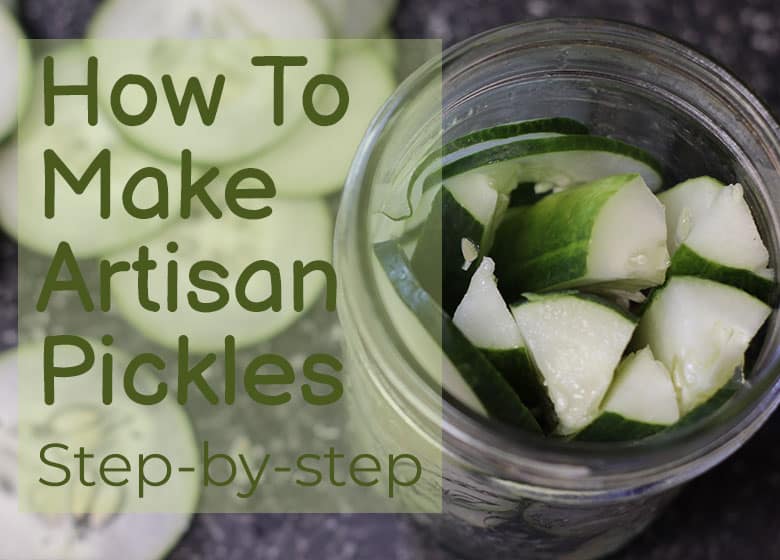
Pickling is gaining popularity alongside farmer’s markets and a popular push for organic foods. If you want to start making your own artisan pickles (or to start pickling any vegetable), it’s important to know:
- What you’ll need
- Step by Step walkthrough to making pickles
- What to look out for
We will give you some of the basic ingredients and items that you will need to start pickling. We will also walk you through the pickling process step by step and give you some things to look out for so you don’t make the same mistakes as others.
Everything You’ll Need
To make sure you’re set up for success, we started with this recipe and modified it to mom’s specifications. The recipe below will fill about 3 standard, wide mouth mason jars.
Ingredients
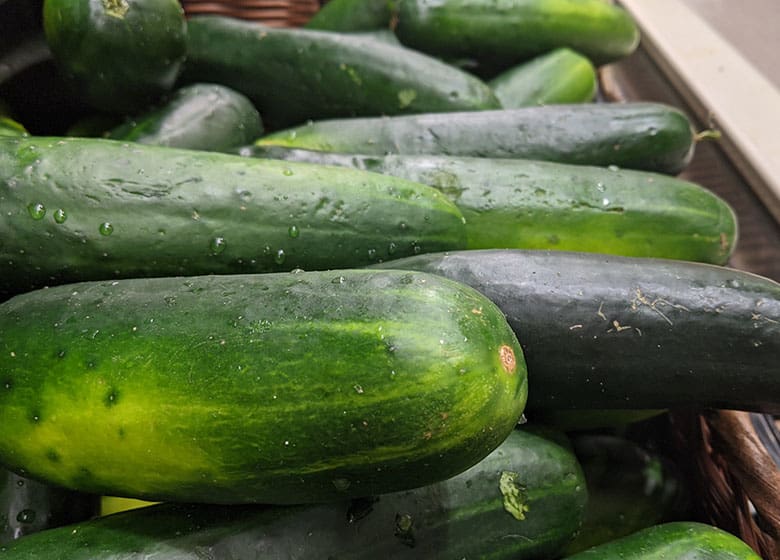
- 3 large cucumbers or 8 Medium to small cucumbers
- Any Cucumber will work but look for smaller cucumbers they will give you the best flavor and have a nice texture.
- 2 cups of water
- ¼ cup iodized salt
- 1 Tbsp dill (or to taste) / per jar
- 1 tsp garlic (or to taste) / per jar
- 1 tsp chili pepper / per jar
- 2 ⅓ cups of white vinegar
- 1 Tbsp Sugar (or to taste)
Can I PIckle With A Regular Cucumber?
Equipment
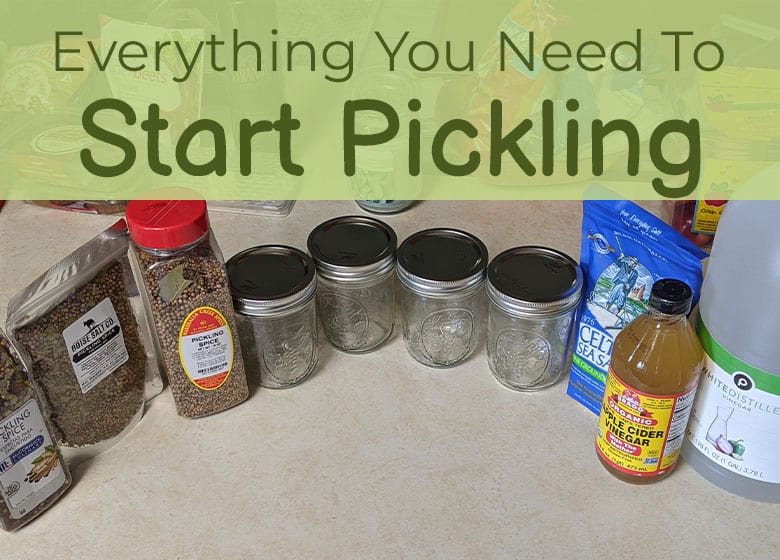
- Quart jars or canning
- Make sure it has a wide mouth! Don’t use the standard Mason jar, for example. Use the Mason Jar that says Full Mouth.
- Wide Mouth lids and bands (and wide lids with metal bands)
- 1 large pot
- Funnel (or jar funnel, if you have one)
- Steam canner with a rack (optional, depending on the method you use)
Steps to Make Your Pickles
The estimated time it will take to finish everything is about 40 minutes from start to finish, including making, jarring, and sealing. The actual pickling process (waiting to eat them as they sit in the jar) takes a little longer. You can eat these in as little as 24 hours, but they taste best after about a week or two. It takes a little bit of time for the brine and all of the flavors you added to work their way into that vegetable.

1.Decide Which Vegetables You Want
While this article pertains to turning cucumbers into pickles, the artisan pickling process is pretty standard for all vegetables. There’s only a mild amount of variation within! For example, if you want to pickle carrots, keeping every step the same regardless of the vegetable would work just fine. Some vegetables simply need to be blanched before the rest of the process takes off.
2.Blanche
Blanching is where you put vegetables in boiling water and steam them, then put them in cold water (making sure they are completely cool before continuing). The blanching process helps with:
- Cleaning
- Preserving flavor
- Preserving color
- Preserving vitamins
- Texture
If you are pickling tomatoes or cucumbers, you don’t really need to worry about blanching. However, vegetables such as beets or carrots should be blanched because they have less water in them.
3.Clean

The process of blanching helps with cleaning the vegetables, so if you decide to skip that step, make sure you clean your vegetables very well! You can use your own methods to clean vegetables as you would normally. Here are a few ways to clean your vegetables if you don’t know how:
- Don’t use regular soap, like dish soap or the like; it will make your veggies taste soapy.
- Rinse them in a bowl with cold water
- If you want a more heavy-duty cleaning process than water, mix 1 cup of white vinegar with 3-parts water, and either spray and scrub the vegetables or soak them in a bowl
- When rinsing with water or the vinegar solution, you can also use a soft brush to scrub the vegetables instead of only using your hands
4.Make the Brine
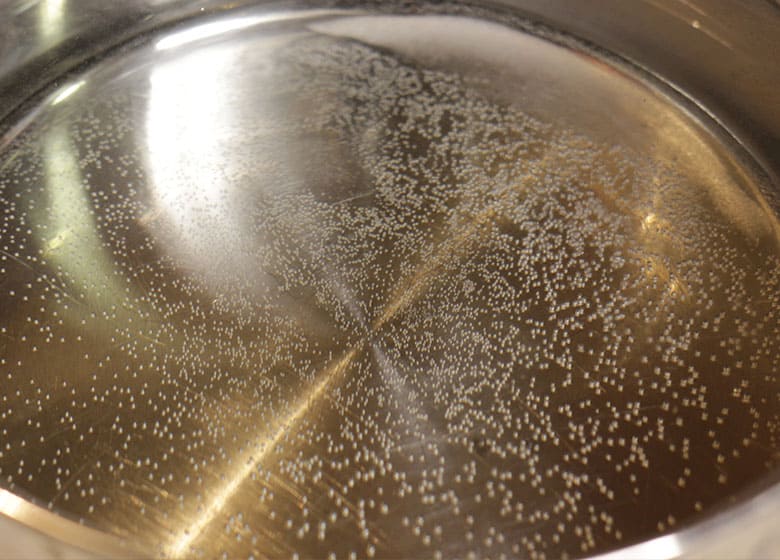
First, you need to put water in the pot and heat it up to bring it to a boil. As the water is heating up, put the salt, sugar, and vinegar into the pot as well, and make sure to leave the lid on!
These are the ingredients for traditional artisan brine; however, feel free to add whatever spices suit your fancy to the jar of cucumbers, not to the boiling brine.
The flavors you can create are truly endless, the only limit is your imagination. I enjoy a nice sweet and spicy pickle so I usually mix in some sort of sweetener in the brine and add a really spicy pepper to the cucumbers.
It truly depends on how you like your pickles and how you’re going to use them.
Prepare Your Cucumbers – Or Other Vegetables

While you let this brine mixture boil, you can go ahead and prep your cucumbers. You can cut them into spears or slices – or simply leave them whole! It really is good to plan ahead as to what you’re using them for.
We will share some great ways to prepare pickles further down in this article! Just pick a recipe and plan accordingly for the best, most conveniently shaped pickles.
Once you’ve cut your pickles up, your brine should be ready to take off the burner (the brine only takes a few minutes to heat up). Once you remove the brine from the heat, place it into a pitcher and give it some time to cool.
While you wait for the brine to cool, you can prepare and fill your jars (the ingredient list gives you enough brine to fill three jars). If you have too much brine, simply discard it. A little secret is to keep extra brine and use it to pickle other things besides cucumbers.
5.Prepare & Fill Jars
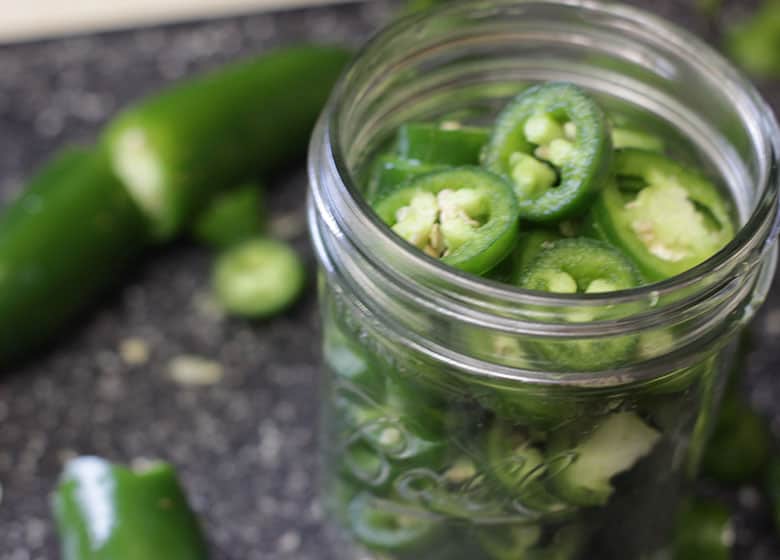
- Boil the jars to kill bacteria
- Put vegetables in the jar and leave a ½” space below the top
- This is because the brine needs to move around and because fermentation creates pressure
- To emphasize this point, make sure you put the cucumbers in before the brine, so you don’t add too much or too little brine mixture!
- Add the ingredients you would like that aren’t in the brine, such as the dill or garlic
6.Close Your Jars
Closing the jars is different than sealing them. Before you close them, you need to check the lid and make sure everything is clean and wiped down. Put the top cover on and tighten with the ring. For the most sterilization, you can even wash the lids or boil them. Make sure to dry the top cover and ring before securing the ring back on the jar. You don’t want buildup within the lid itself.
7.Start Sealing
To seal your jars, use a hot water bath or steam. Both are pretty simple steps. They really just depend on your resources.
If you have a steamer, it would be easier to use the steam method, as it gives more accuracy for when to start timing (we’ll explain “timing” in a moment) and allows a lot of space. It can also hold many jars at once. If you don’t have a steamer, the hot water bath method is just as effective and only slightly more complex.
For the steam method:
- Grab your steamer and fill the bottom with water
- Put the jars on the steam canner
- Try not to put too many jars in the steamer (aim for a maximum of about seven). Otherwise, it will block the holes for the steam to escape
- Make sure the steamer lid is on properly, then start to boil the water
- Set a 10-minute timer when you start to see steam. At the end of 10-minutes, take the jars out with your tongs and let them sit, on a cooling rack, untouched, overnight.
For the hot water bath method:
- Use a large pot (perhaps the one used for the brine, once washed)
- The pot should be able to fit all jars to save time.
- The water should cover about an inch over the jars, so they are fully submerged in water.
- Turn the burner on and leave the lid on the pot. Expect to wait 30 minutes for the water to come to a full, rolling boil.
- You could start boiling this water during a previous step for efficiency. Perhaps start boiling the water right before you start putting the pickles and brine in the jar.
- You *could* even start boiling it as soon as you put the brine to be cooled, but it depends on your speed in the kitchen. It might be ready before you need it if you do this.
- Leave the jars in the pot for 10 minutes. Then, take them out using your tongs and let them sit, on a rack, untouched, overnight.
Pro Tip: Do not set the hot jars directly on the countertop as it will either scorch the countertop or cause the jar to burst from the extreme temperature difference.
8.Secure
It’s important to make sure the jars are fully sealed, allowing for proper fermentation and cleanliness. To check for this, look at the center in the little circle (usually indicated with a label stating it’s the safety seal). It should be concave. If it isn’t concave, it can be pressed down and makes a popping noise, that means it hasn’t sealed properly. In this case, skip the step of leaving them out overnight and put in the fridge immediately.
Another way to be certain your jar has sealed properly is that you will hear a slight “pinging or popping” sound as the jar begins to cool after it has been removed from the hot water.
9.Enjoy!
You should wait for 24-hours at the bare minimum, as this is when the seasonings will start getting absorbed properly into the pickles. However, waiting for one or two weeks is better.
Most people who make pickles often, such as for work, usually suggest waiting for two weeks. That seems to be the agreed-upon point that’s best to take them out!
How Long They Will Last
Keep in mind how long they will last as well. Be sure to write a label on all homemade food, including the date made and the contents. For pickles that didn’t seal properly and had to go straight in the fridge (or as soon as you open the sealed jar), consume them within about a month.
If they were properly sealed and haven’t been touched yet, their shelf life is about a year. However, they get less crunchy as time goes on – so be mindful of this!
Common Mistakes Made While Pickling
You may think pickling is easy if you follow a recipe and use the instructions perfectly. However, pickling is more of an art than a science. There is so much variation in what individual people like, so the recipe listed in this article may not be your personal preference. Even if you find a good recipe with the perfect blend of herbs and spices, mistakes can still be made!
The Wrong Cucumbers
As stated in the ingredients, the smaller cucumbers yield the best results. The larger cucumbers are not as effective because they retain a lot of water, making it more difficult for the spices to penetrate the cucumber.
This higher water content also waters down any spices added and makes your pickles very bland and lacking a lot of crunch.
While this is all true, this doesn’t mean that you can’t make great tasting pickles with the standard cucumbers in your supermarket. You will just have to cut them into slices or spears, that way they will stay crunchy and fit into most jars.
Pickling Too Many Vegetables Together
Another major thing that will affect the flavor is putting too many different veggies in one jar. Make sure you start pickling with one-type of vegetable in one jar at one time. If you want to mix in the future, that could work.
Not everything will pair well together, though. You may think it will save time, but mixed veggies need varied care.
The Wrong Salt
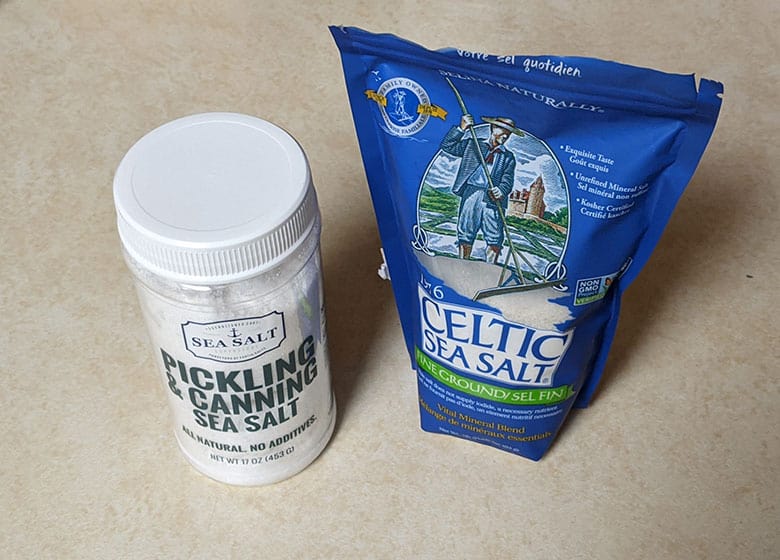
As the ingredients list also notes, use iodized salt (such as kosher salt). You could also use salt specifically for pickling, called “canning” or “pickling” salt.
The issue with non-iodized salt is that it causes the water to be murky and gives it a sort of unappealing look. Canning salt also sticks to the cucumber faster because it dissolves slowly.
Not Blanching
You may think you don’t need to blanch your vegetables, as outlined in “Step 2” and can simply clean them instead. However, it’s important to remember that some vegetables need blanching, while others don’t.
You can look online for a specific list based on your vegetable, but a rule of thumb is to blanch veggies that don’t retain water as much.
Inconsistency
If you’re not using the same amount of ingredients each time, it’s hard to adjust a control variable to see where your recipe is going wrong. Or even worse, if you do not measure at all!
Especially with the brine, it’s important to record what you do. Write down what you put in each batch to leave yourself a clear record so you can make any revisions you desire. You can also experiment and play with ingredients each time to tweak your recipe with precision.
Not Allowing Enough Time
You have to be patient with pickles. While 24 hours is given as the minimum amount of pickling time, it is frequently suggested to aim for 2-weeks. If you try to rush the process (such as making pickles for an upcoming event), you will likely end up disappointed.
How to Eat Pickles & Popular Recipes
Pickles aren’t just for garnishes anymore. Here are some unique ways to use your canned pickles or brine.
If you’re thirsty…
Believe it or not, you can drink pickle juice! You may already know this, but the thought of it may scare you. If you like pickles, you may like pickle juice too. So, you could chug it straight or mix it in with something. Try to keep an open mind!
Drink the brine straight
You could drink it straight to wash down a nice burger or BLT on a hot summer day. This would be best with a charcuterie board as well if you want a little twist to tradition. Put only the brine in a mason jar for a nice, whimsical addition.
Make It Alcoholic
Mix the brine with a bloody Mary. Just combine tomato juice, brine, vodka, and a little hot sauce, and you’re on your way. Or you could put it in a martini if tomato juice isn’t your style. You just need brine and vodka. Don’t knock it until you try it!
Or Hungry…
The good thing about pickles is the number of things you can do with them. Before you embark on your pickling journey, consider what you will use them for most. If you want them in sandwiches, you may make them a little more salty or add a spicy factor. If you want them on a little cheese board, consider making them on the sweeter side.
Put It in A Sandwich
Putting pickles is inside sandwiches is very popular. You could put potato chips on the side or for something a little different: pickle and potato chip sandwich. There’s something rare and delightful about putting potato chips in a sandwich. Chips and pickles give you two different types of crunch, providing an incredibly satisfying texture.
Mix It With Peanut Butter
Put pickles in a peanut butter sandwich for a little salty flavor and some crunch. You could also put pickles in with apple slices. Or, on a cheese board, you could lay out crackers with a thin layer of some peanut butter that’s been mixed with brine, a thin apple slice, and a piece of cheese on top. Unconventional yet delicious.
Toss It In a Salad
Salads don’t have to be boring! Start with your base (lettuce, spinach, kale, or whatever you prefer) and add ingredients that pair well with pickles. You could try it with other vegetables you pickled or make something based on the season! For summer, a salad with fruits, such as strawberries or blueberries, would be great! Or for fall, perhaps some rhubarb, squash, and onions! You could even add some garlic stuffed olives for a lot of packed flavors. There’s a lot of possible variation, and you can switch it up every time!
Use It to Marinate
You can actually use the brine to marinate chicken if you please! It’s best to not only use the brine – perhaps consider adding a few other spices to somewhat “dilute” the taste. This is because the brine may tend to act as a dominant flavor and may make a potent chicken.
Make It Into a Dessert
If you are a pickle fanatic, you could even freeze the brine. Some may be a little unsure about this, but it’s sort of a love it or hate it type of delicacy. You could use it for a nice little summer snack or as a healthier alternative to actual ice pops and ice cream due to a lack of sugar. It’s perfect for a diet when you get those pesky cravings!
Things to Know About Pickling
As with everything in life, there are pros and cons. There are some important health-related pieces of information we want to share with you about pickling.
Health Benefits & Weaknesses
Pickles have a contradicting reputation among health professionals. Some, such as in plenty of weight-loss communities, seem to believe pickles cause great health benefits. The main debate is the popular claim that pickles can prevent cancer. The thought process is that the antioxidants in pickles may prevent radicals that are linked to cancer. The theory continues that actual cancer-causing is more related to stomach cancer, associated with the store-bought type of pickle.
Fermentation
One factor that plays into the health of pickles (or anything pickled) is that they are fermented (through some methods). Fermentation means the natural sugars in whatever was pickled are broken down.
This happens through the process of leaving them in saltwater over a brief period of time. Since the sugars are removed, it makes the pickled product more “healthy,” which is why drinks like kombucha are so popular in weight loss markets.
Benefits
There are plenty of health benefits from pickles (even the non-fermented kind) or fermented food in general. Pickling can actually prove to be better than cooking because it preserves important antioxidants that are thought to be a key to fighting cancer. Some examples of this type of food are yogurt and sauerkraut.
Some suspected benefits include:
- Relieves muscle cramps and inflammation
- Helps diabetics and their insulin resistance
- Aids weight loss
- Prevents cancer
- Good for athletes for loss of electrolytes
Weaknesses
Usually, pickles (the kind you get at the store) contain a lot of salt. This can be an issue for people with high blood pressure and is linked to stomach cancer for anyone – not just those predisposed to get it.
A great way to limit the amount of sodium in pickles is to make them yourself – which is why so many people do.
Safety Issues
If not prepared properly, some health hazards can arise from pickling. Below we provide some cautions.
What is Botulism
Botulism is an uncommon but serious issue. It primarily comes from when people try their hand at their own preserves, such as pickling or even jams. It can cause symptoms such as:
- Drooling
- Weakness
- Fatigue
- Nausea
- Vomiting
It’s critical that you take the right measures to prevent this from happening.
How Botulism Can Happen from Pickling
If you followed the steps provided in the “Steps to Making Pickles” section, everything should go well. However, if you haven’t done it correctly, you could make a mistake and not even realize it.
Your most important action for prevention is to make sure the jar is sealed all by making sure the lid is concave and to listen for the light ping or pop it makes when it’s removed from the hot water – indicating it’s properly sealed.
Can You See If Pickles Have Botulism?
Signs of botulism can be quite distinct – though not always. Some pretty obvious signs are when the jar has some form of damage, like if it’s dented or leaking. Anything out of the ordinary should be looked into further. If there’s room for hesitation, err on the side of caution and throw that jar of pickles away.
Next, look at the pickles when you do open the can or jar. If it smells different than before, it is the wisest decision to throw out. If it changed color in any way (especially if you notice anything white in the brine), toss it immediately. Make sure you also dispose of any remnants.
If possible, take it out of your home to your regular trash – especially if you have pets or kids. Thoroughly clean and sanitize all counters and wash your hands. Botulism spreads rapidly, and even a spill on the floor that your dog licks could make it sick.
Check your area and make sure everything is wiped down and disposed of properly.
How to Prevent Botulism When Pickling
A good rule of thumb is to follow professional guidelines as a final guide. The USDA even has a complete guide to canning at your own home, so their practices are the best way to prevent this from happening.
Use the Right Equipment for Pickling at Home
Your best bet is to get the right equipment, as well. Your safest move is to pressure can your pickles, rather than just using boiling water. Also, you need to ensure everything is clean – from the beginning of the prep work and all the way through to putting the finished pickles on the storage shelf.
Sterilize everything with hot water and plenty of soap. Use a towel or to prevent the potential for further contamination, a paper towel to dry everything. Make sure all surfaces are extremely dry to prevent bacteria from developing or spreading.

To sterilize the jars themselves, you need to be a little more rigorous. Boil them for 15 minutes in water and leave them in the hot water until you need them. Boil the lids separately and repeat the process you performed with the jars.
Getting Into the Pickles
You can buy your own pickling spices, or you can even make your own as well by following a simple recipe. Some great pickling spices to add are:
- Coriander
- Pepper flakes
- Allspice
- Bay leaves
- Ginger
- Cloves
You can combine all kinds of spices with lots of variation. You could even plan ahead with what you’re going to be using your pickles for and ensure everything is paired nicely for maximum effectiveness.
All in all, making your own pickles (or pickling any vegetables) is a cost-effective, healthy alternative to the store-bought kind. It also allows you to create specific mixes to suit your own palette and perfect your own recipes.
The variation with the brine and actual pickles (such as even using it for dessert) creates a tasty, healthy, varied treat. If you’re looking for variation, pickling your own vegetables is the way to go!
Sources:
Recipe idea & Process: https://www.themediterraneandish.com/quick-pickled-cucumber-recipe/
Safe practices (general): https://anrcatalog.ucanr.edu/pdf/8573.pdf
Safe practices (steam canning): https://www.tasteofhome.com/article/steam-canning-safety/
Extra tips: https://www.blessthismessplease.com/quick-pickled-cucumbers/